The Do’s and Don’ts of Gutter Repair

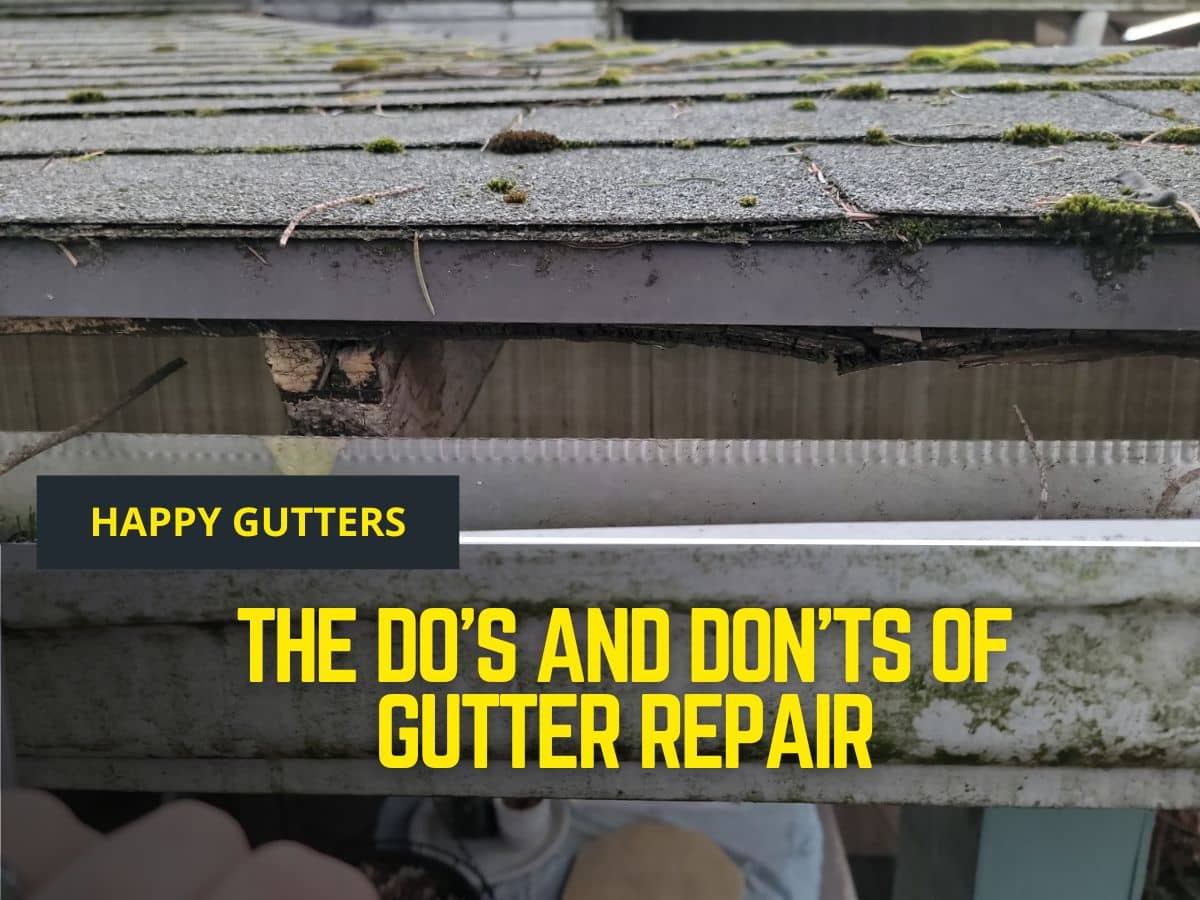
Damaged house gutter with visible signs of wear and tear

In every home, the gutters play a crucial role in directing water away from the foundation, preventing costly water damage, and maintaining the structural integrity of the property. However, to ensure that your gutters are functioning effectively, regular maintenance and timely repairs are essential. Here, we delve into the do’s and don’ts of gutter repair to help you keep your Happy Gutters in top condition.

The Do’s of Gutter Repair

1. Regular Cleaning

Proper gutter maintenance starts with regular cleaning. Leaves, twigs, and debris can accumulate in your gutters, leading to clogs that prevent proper water flow. To prevent gutter damage, aim to clean your gutters at least twice a year or more frequently if you have overhanging trees.

2. Inspecting for Damage

Regularly inspect your gutters for signs of damage such as leaks, rust spots, or sagging sections. Addressing these issues promptly can prevent more extensive damage and costly repairs down the line.

3. Proper Maintenance

Routine maintenance is key to preventing gutter damage. Here are some gutter maintenance tips to keep in mind:

  • Trim back overhanging tree branches to prevent debris buildup.
  • Check for loose or missing fasteners and tighten or replace them as needed.
  • Ensure that gutters are securely attached to the fascia board to prevent sagging.

The Don’ts of Gutter Repair

1. Neglecting Repairs

One of the biggest mistakes homeowners make is neglecting gutter repairs. Ignoring issues such as leaks or clogs can lead to water damage, mold growth, and structural problems. Prevent gutter damage by addressing repairs promptly.

2. Using Incorrect Tools

When it comes to gutter repair, using the right tools is crucial. Avoid using sharp tools that can damage your gutters, and opt for tools specifically designed for gutter maintenance. Here are some tools and equipment you may need:

ToolPurpose
Gutter ScoopTo remove debris
Gutter GuardsTo prevent debris buildup
LadderFor safe access to gutters
HoseFor flushing out debris

3. DIY Mistakes to Avoid

While some minor gutter repairs can be done DIY, certain tasks are best left to the professionals. Here are some DIY mistakes to avoid:

  • Ignoring safety precautions when working at heights.
  • Incorrectly positioning the ladder, leading to accidents.
  • Using the wrong materials for repairs, which can worsen the issue.

Hiring a Professional

1. Benefits of Hiring a Professional

Hiring a professional gutter repair service offers several advantages, including expertise, safety, and efficiency. Professionals have the knowledge and experience to identify and address gutter issues effectively, ensuring the longevity of your gutter system.

2. Signs That You Need Professional Help

While some gutter repairs can be DIY, certain signs indicate that it’s time to call in the professionals. These include severe gutter damage, extensive rust, or sagging gutters that require expert attention.

3. What to Look for in a Reputable Gutter Repair Company

When choosing a gutter repair company, look for reputable companies with a track record of quality service, positive reviews, and proper licensing and insurance. Ensure that the company offers a comprehensive range of gutter repair services to address your specific needs.

Conclusion

Maintaining and repairing your gutters is essential for the longevity and efficiency of your gutter system. By following the do’s and don’ts outlined above, you can prevent gutter damage, ensure proper water drainage, and protect your home from water-related issues. Remember, Happy Gutters lead to a happy home!

Signs Your Gutters Need Immediate Repair: Protecting Your Home from Water Damage

gutter repair

Introduction: Gutters are an essential component of any home’s external structure, responsible for directing rainwater away from the foundation and preventing water damage. However, over time, gutters can become damaged, clogged, or inefficient, compromising their ability to protect your home. In this blog post, we will discuss the signs that indicate your gutters need immediate repair, emphasizing the importance of taking prompt action to avoid costly water damage.

I. The Gutters’ Exterior:

The first step in identifying gutter problems is to inspect the gutters’ external appearance. Here are some signs to look out for:

  • Sagging Gutters: Take note if your gutters are visibly sagging or pulling away from the house. This indicates that the gutter system has become compromised, possibly due to excessive debris accumulation or inadequate support brackets. Sagging gutters can result in poor water flow and potential water pooling near the foundation, leading to costly foundation damage.
  • Visible Cracks, Holes, or Rust: Check for any damage such as cracks, holes, or rust on the gutter surface. These issues can obstruct the proper flow of water and cause it to leak onto your home’s exterior walls or foundation. Ignoring these signs can lead to severe water damage and compromise the structural integrity of your property.
  • Gutter Joints and Brackets: Inspect the joints and brackets that hold the gutters together. Loose or damaged components can cause gutters to become unstable and prone to separation. If not addressed promptly, this can result in water overflowing and seeping into your home’s foundation.

Regularly inspecting your gutters’ exterior can help you detect these potential problems early on and prevent further damage.

II. Water Overflow and Diversion:

Inspecting the flow of water within your gutters and its proper diversion away from your home is crucial for keeping your property safe from water-related damages. Watch out for the following signs:

  • Water Pooling Near the Foundation: If you notice water pooling near your home’s foundation, it indicates that your gutters are not effectively diverting water away from the property. This can lead to expensive foundation repairs, as excessive water can penetrate the foundation, causing cracks and compromising its stability. Immediate repair and maintenance are necessary to avoid severe damage.
  • Leaky or Separated Downspouts: Ensure that your downspouts are securely attached and properly functioning. Leaks or separations can result in water being deposited too close to your home, potentially causing foundation erosion or basement flooding. Prompt gutter repair and downspout reattachment are essential to prevent further damage and ensure proper water diversion.
  • Clogged or Disconnected Downspouts: Keep an eye out for downspouts that are clogged or disconnected from the gutters. When downspouts are blocked, water overflows, leading to potential damage to your home’s exterior walls, foundation, or landscaping. Make sure to clear any clogs and reattach disconnected downspouts to maintain an effective drainage system.

Regularly checking for water overflow and diversion issues can help you identify gutter problems in a timely manner and protect your home from water damage.

III. Gutters’ Interior:

While examining your gutters’ exterior is crucial, do not forget to inspect their interior as well. The following signs should not be ignored:

  • Rotting or Peeling Paint on Fascia or Soffits: If you notice the paint on your fascia or soffits is peeling or rotting, it may be an indication of prolonged moisture exposure. Faulty gutters can cause water to overflow onto these surfaces, leading to damage that should be resolved immediately.
  • Accumulation of Shingle Granules in Gutters: Check for the buildup of shingle granules in your gutters. These granules are commonly present in asphalt shingles and indicate roof deterioration. When gutters are not functioning properly, excess granules can accumulate, potentially causing blockages and impeding water flow.
  • Presence of Mold, Mildew, or Pests: Inspect your gutters for any signs of mold, mildew, or pest infestations. Excessive moisture caused by clogged or leaking gutters can create a favorable environment for mold and mildew growth, which can be harmful to your health. In addition, gutter debris can attract pests, leading to potential damage. Cleaning and repairing your gutters promptly can prevent these issues.

Regularly examining the interior of your gutters will help you identify problems that might go unnoticed, allowing you to take immediate action and avoid further damage to your home.

IV. Gutters Handling Heavy Rainfall:

Your gutters must be capable of handling heavy rainfall to prevent water damage during storms. Consider the following signs:

  • Gutter Overflow during Rainfall: Monitor your gutters during heavy rain to ensure they are not overflowing. If water is spilling over the sides, it indicates an issue with either the gutter sizing or excessive debris blocking the flow. Prompt gutter cleaning and repair are necessary to avoid water entering your home or causing damage to the surrounding landscape.
  • Consequences of Water Damage during Heavy Rain: Failure to address gutter problems can lead to significant water damage. This includes potential basement flooding, compromised structural integrity, and damage to the foundation and landscaping. Ensuring your gutters are well-maintained and designed to handle heavy rainfall is crucial for protecting your home.

Before the rainy season, schedule maintenance and repairs to ensure your gutters are in optimal condition and ready to handle heavy rain effectively.

V. Winter-Specific Issues:

Winter weather brings its own set of challenges for gutters. Consider the following precautions:

  • Ice Dams: Ice dams can form on gutters and roofs during freezing temperatures. These ice formations prevent proper water flow and can cause water to back up into your home, resulting in roof leaks and water damage. Before winter arrives, ensure your gutters are clear of any debris and consider installing gutter guards to prevent ice buildup and clogging.

Taking proactive measures in the fall by inspecting and repairing your gutters will protect your home during the winter months.

Conclusion: Regularly inspecting and maintaining your gutters is essential for avoiding costly water damage to your home. By paying attention to the signs discussed in this blog post, such as sagging gutters, water overflow, interior damage, and issues related to heavy rainfall and winter weather, you can identify when gutter repairs are needed. Remember to seek the assistance of professional gutter contractors or a local gutter company for dependable gutter cleaning and repair services. Taking immediate action will safeguard your home’s infrastructure and foundation from potential devastation caused by leaking gutters.

How to Fix Sagging Gutters: A Comprehensive Guide

Person repairing a sagging gutter with tools.

Are your gutters hanging low like a pair of sagging pants? Don’t worry, we’ve got you covered! In this in-depth guide, we will walk you through the steps to fix sagging gutters and prevent further damage to your home. From identifying the causes of sagging gutters to DIY fixes and when to call a professional, we’ll cover it all. Let’s get started!

Common Causes of Sagging Gutters

How to Fix Sagging Gutters: A Comprehensive Guide

The first step in fixing sagging gutters is understanding what causes them in the first place. The primary culprits are heavy rain and clogged gutters. However, other factors such as poor gutter installation or age-related wear and tear can also contribute to sagging. Identifying the specific cause of your sagging gutters is crucial as it will help you determine the most effective fix.

Assessing the Severity of Sagging Gutters

Before diving into the repairs, it’s important to assess the severity of sagging gutters. Minor sagging issues can often be fixed with simple DIY solutions. However, major structural issues may require professional intervention. To assess the severity, you can visually inspect the gutters for sagging and check for overflowing water during rainfall. Neglecting sagging gutters can lead to serious water damage to your home, making timely repairs all the more crucial.

DIY Fixes for Sagging Gutters

How to Fix Sagging Gutters: A Comprehensive Guide

Fix 1: Adjusting the Slope

One of the simplest ways to fix sagging gutters is by adjusting their slope. Gutters should have a slight slope towards the downspouts to ensure proper water drainage. Here’s how you can do it:

  1. Gather the necessary tools: Ladder, tape measure, level, screws, and brackets.
  2. Locate the sagging section: Identify the sagging area along the gutter.
  3. Determine the new slope: Measure the current slope and calculate the desired angle based on your gutter system’s requirements.
  4. Loosen the gutter brackets: Loosen the screws holding the sagging gutter section in place.
  5. Adjust the slope: Using a level, make the necessary adjustments to achieve the desired slope.
  6. Reattach the gutter: Secure the gutter back in place by tightening the screws on the brackets.

Fix 2: Reinforcing with Brackets

Another effective solution for sagging gutters is adding brackets for additional support. Here’s how you can reinforce your gutters using brackets:

  1. Prepare the materials: Brackets, screws, drill, and screwdriver.
  2. Identify the sagging areas: Locate the sections of the gutter that need reinforcement.
  3. Position the brackets: Place the brackets on the front and back edges of the sagging gutter section.
  4. Screw the brackets: Drill pilot holes and attach the brackets securely with screws.
  5. Test for stability: Apply gentle pressure to ensure the gutter is firmly supported by the brackets.

Fix 3: Clearing Clogs and Debris

Clogged gutters can contribute to sagging, so it’s important to keep them clean. Here’s how you can clear clogs and debris from your gutters:

  1. Safety first: Use a sturdy ladder and wear gloves and protective eyewear.
  2. Remove loose debris: Start by manually removing leaves, twigs, and other debris from the gutters with your hands or a small scoop.
  3. Flush the gutters: Use a garden hose or a gutter cleaning tool with a high-pressure nozzle to wash away remaining dirt and clogs.
  4. Inspect the downspouts: Ensure that the downspouts are clear of any obstructions to allow proper water flow.

Fix 4: Adding Additional Hangers

If sagging persists even after slope adjustment and bracket reinforcement, adding extra gutter hangers might be necessary. Here’s how you can do it:

  1. Determine the position: Identify the areas where additional support is needed.
  2. Install hangers: Place the hangers at regular intervals along the gutter, ensuring they align with the fascia board. Use gutter hangers specifically designed for your gutter type.
  3. Screw in the hangers: Drill pilot holes and use screws to attach the hangers securely.
  4. Test for stability: Apply gentle pressure to confirm that the gutters are adequately supported.

When to Call a Professional

While DIY fixes can often solve sagging gutter issues, there are scenarios where professional assistance is warranted. Consider contacting a professional gutter repair company if:

  • The sagging gutters are extensively damaged or require replacement.
  • You are unsure of the underlying cause or unable to identify the best course of action.
  • The repairs seem too complex or dangerous to handle on your own.

Investing in professional expertise can save you time, effort, and ensure long-lasting results.

Preventative Measures to Avoid Future Sagging Gutters

How to Fix Sagging Gutters: A Comprehensive Guide

To prevent sagging gutters in the future, regular maintenance is paramount. Here are a few preventative measures you can take:

  • Clean your gutters: Regularly clean your gutters to remove debris that can cause clogs and strain the gutter system.
  • Inspect your gutters: Schedule routine inspections to detect potential issues early on and address them promptly.
  • Invest in gutter guards: Install gutter guards to keep your gutters clear of debris and reduce the frequency of cleaning.
  • Ensure proper installation: Opt for professional gutter installation to ensure your gutters are securely attached and sloped correctly.

By following these preventative measures, you can maintain a properly functioning gutter system and avoid future sagging issues.

Conclusion

Fixing sagging gutters is crucial for protecting your home from water damage. By accurately assessing the severity, identifying the causes, and employing appropriate repair methods, you can restore the functionality and aesthetics of your gutters. Whether you choose to tackle the repairs yourself or seek professional assistance, addressing sagging gutters promptly will save you from costly repairs down the line. Remember, regular maintenance and preventative measures are key to ensuring the longevity of your gutters and safeguarding your home. So, roll up your sleeves and get ready to fix those sagging gutters!

For more information or assistance with gutter repair, reach out to us Your Local Gutter Repair Professionals.

How to Repair a Leaky Gutter: A Comprehensive Guide to Tackle the Drip!

Close-up of a leaking gutter with visible rust and water damage on the house facade.

Introduction

Gutters play a crucial role in directing rainwater away from your home’s foundation and preventing water damage. However, over time, gutters can develop leaks due to various reasons, such as clogging, debris buildup, damaged seams, loose connections, or improper pitch. Fortunately, with the right tools, knowledge, and a little effort, you can repair a leaky gutter yourself and save money on professional services.

So, let’s dive into the comprehensive step-by-step guide on how to repair a leaky gutter and ensure your home remains dry and well-protected.

Understanding the Causes of Leaky Gutters

Before we jump into fixing the problem, it’s important to understand what causes gutters to leak. By identifying the root cause, you can apply the appropriate repair technique and prevent future leaks. Some common causes include:

  • Clogging: Debris, such as leaves and twigs, can accumulate in the gutter and block the water flow. This excess debris puts pressure on the gutters and may result in leaks.
  • Damaged Seams: Over time, gutter seams may deteriorate due to exposure to harsh weather conditions, leading to leaks.
  • Loose Connections: If the gutter sections or downspouts are not securely fastened, water can escape through the gaps or joints.
  • Improper Pitch: If the gutter is not sloped correctly, water may not flow towards the downspouts, causing pooling and subsequent leaks.

Understanding the causes will help you identify the specific issue with your leaky gutter and choose the appropriate repair method.

Essential Tools and Safety Precautions

Before embarking on your gutter repair journey, it’s vital to gather the necessary tools and take precautionary measures to ensure your safety:

Tools Required:

  1. Ladder
  2. Safety Harness
  3. Gloves
  4. Screwdriver
  5. Sealant (compatible with your gutter material)
  6. Putty Knife
  7. Garden Hose
  8. Bucket

Safety Precautions:

  1. Wear protective gear, including gloves and safety glasses, to safeguard yourself from debris and potentially harmful substances.
  2. Use a sturdy ladder and always have someone spot you while working at heights.
  3. Ensure the ground beneath the ladder is level and free of any obstacles.
  4. If the repairs seem beyond your capabilities or involve working at dangerous heights, consider hiring a professional.

Step-by-Step Repair Guide

Now that you’re equipped with the necessary tools and safety precautions, let’s walk through the step-by-step process to repair your leaky gutter:

A. Cleaning and Inspection

  1. Clearing Debris:
    • Safely climb your ladder and begin removing debris (leaves, sticks, and dirt) from the gutter using a gloved hand or a scoop.
    • Place the debris in a bucket or tarp for easy disposal.
    • Use a garden hose to flush out any remaining small particles or clogs.
  2. Inspecting for Damage:
    • Thoroughly examine the gutter for cracks, holes, loose joints, or any signs of damage.
    • Pay close attention to the gutter seams, end caps, and downspouts, as these are common areas for leaks to occur.
    • Make a note of all the potential repair spots that require further attention.

B. Repairing Leaky Gutters

  1. Patching Small Holes or Cracks:
    • Using a putty knife, carefully scrape away any loose debris or old sealant around the damaged area.
    • Apply a generous amount of gutter sealant along the inside of the hole or crack, smoothing it out with the putty knife.
    • Allow the sealant to dry completely as per the manufacturer’s instructions.
  2. Replacing Damaged Sections:
    • In cases where a patch won’t suffice or the damage is extensive, you may need to replace a section of the gutter.
    • Measure the length of the damaged section and purchase a new gutter segment of the same material and size.
    • Safely remove the damaged section using a screwdriver or drill.
    • Install the new gutter segment, ensuring it securely fits with the adjacent sections, and fasten it using screws or brackets.
  3. Fixing Loose Connections or Sagging Gutters:
    • Identify any loose connections or sagging sections in the gutter system.
    • Tighten loose screws, brackets, or hangers to secure the gutter and maintain proper water flow.
    • For severely damaged or improperly pitched gutters, consider consulting a professional for a more comprehensive repair solution.

Preventive Measures for Future Leaks

Prevention is key when it comes to maintaining a leak-free gutter system. Implement the following preventive measures to keep your gutters in optimal condition:

  1. Regular Gutter Maintenance:
    • Schedule routine gutter cleaning at least twice a year, especially during the autumn and spring seasons, to prevent debris buildup and clogging.
    • Inspect and clear gutters after heavy storms to remove any accumulated debris or branches.
    • Trim overhanging tree branches that may contribute to clogging your gutters.
  2. Installing Gutter Guards:
    • Consider using gutter guards or screens to keep out leaves and other debris, reducing the need for frequent cleaning and minimizing the chances of future leaks.

Conclusion

Repairing a leaky gutter is a manageable task that can save you from potential water damage and costly repairs down the line. By following this comprehensive guide, you now have the knowledge and tools to tackle any gutter leak.

Remember, regular maintenance and prompt repairs are key to preserving the functionality of your gutters and protecting your home. If you ever need assistance or want to ensure professional results, Happy Gutters is here to help. Don’t delay – repair those leaky gutters and keep your home’s exterior happy and well-maintained!